duminică, 26 decembrie 2010

Beyond Foam

I know this post was supposed to be about the test board & how it was build, but there's a good reason why this is being slightly delayed - a couple of trees just came in ! Actually a new order arrived a couple of days ago, not because I wanted so, but the guys at LokShop decided it was time to ship all the items already in stock (even though this accounted for only half of the total products ordered; maybe it's company policy - don't let the modeller down on Christmas no matter what). Anyway, along with the trees made their way, among others: a couple of Marklin bridge ramps, a Lenz DCC inverter, some PIKO replacement wheels, a couple of Noch tunnel portals, a few Woodland Scenics rock molds and a Brawa freight car. So I'm right now I'm thinking Brawa car + test board + one tree for the next photo shooting.
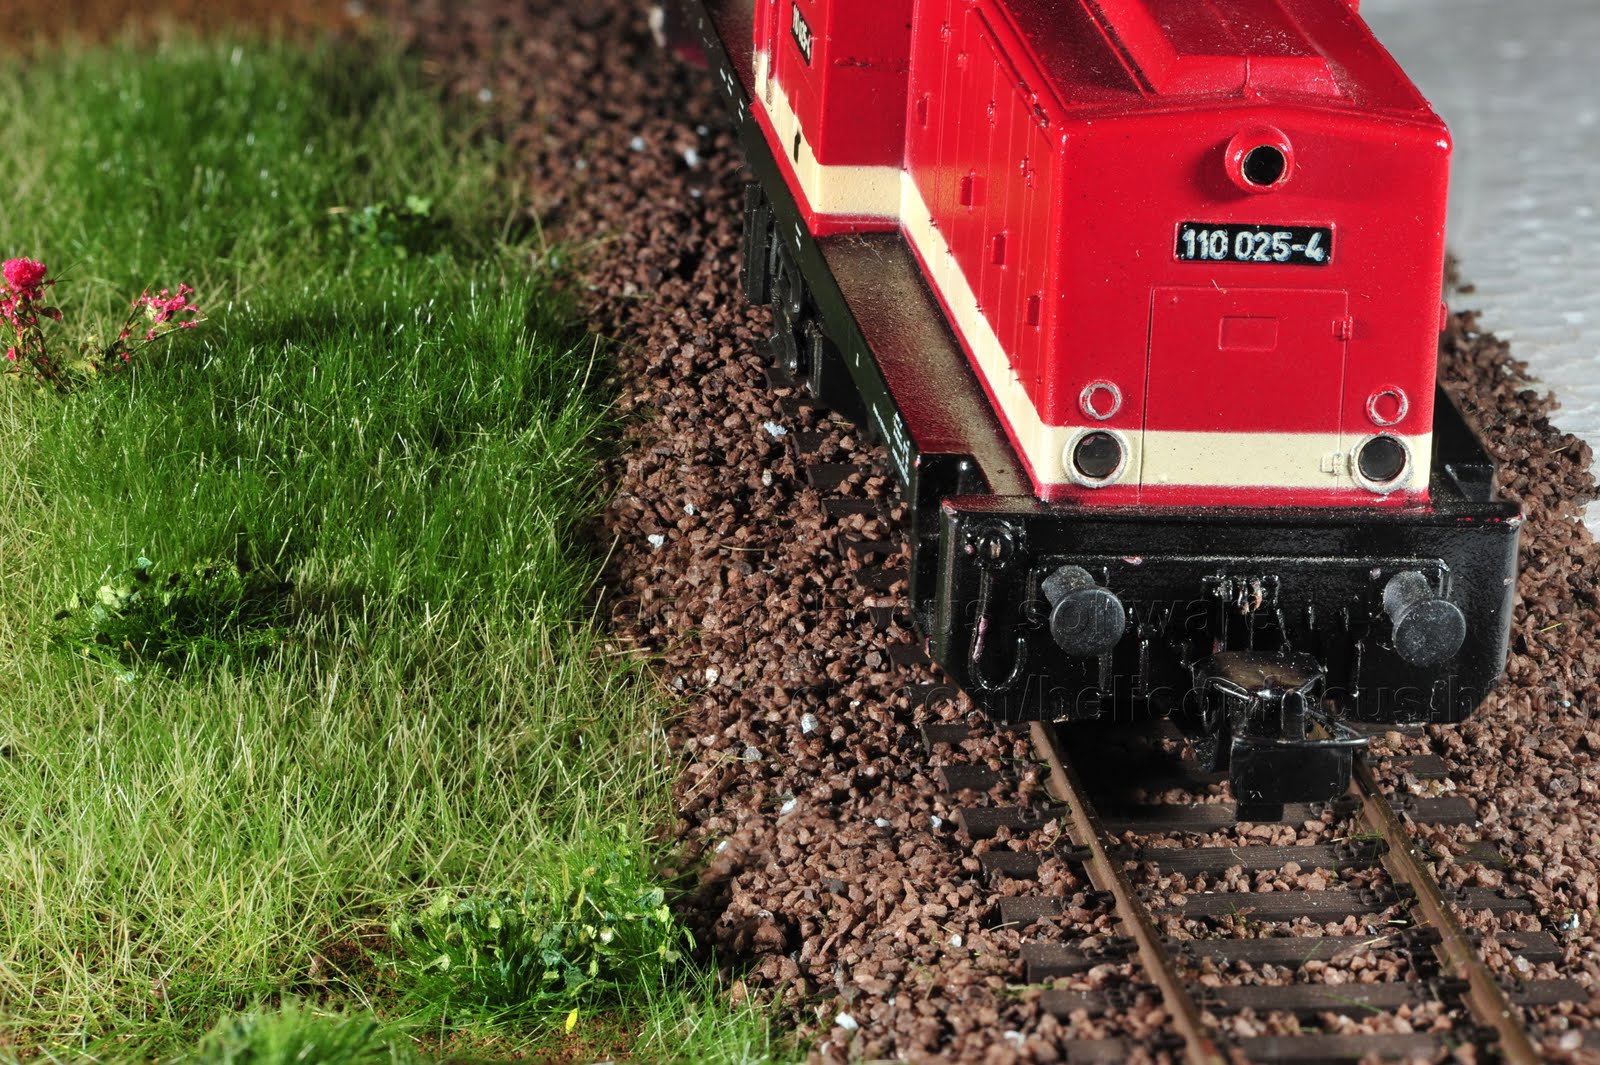
But getting back to the actual layout, there's one last piece of track that needs to be done in order to close the "loop" - the overpass bridge between the two tea cans. For this I got a couple of Marklin 74613 bridge ramps, and even though they are 360 mm in radius, I think I'll be able to keep the 380 mm radius from my plan. These come with hand rails and walkways on each side of the track; also the rivets are nicely done and the fixing system seems very sturdy. The one placed on the track is not equipped with these, while the other one placed on the foam is. The whole foam area is going to be elevated in the form of a hilly/mountaineous region, so the pre-tunnel track will look like it's carved its way through the landscape. For the overpass section a total of 3 ramps will be needed (it appears i won't be able to get away with just 2, as I originally thought). Of course such a long span cannot sustain itself, so an extra support it's going to be needed in the middle. And since the corresponding Marklin piers are out of the question (big bulky masonry piers), I think I will go with the new Noch girder structure. The problem with all the new laser-cut bridge kits from Noch is that they have been delayed ever since July. A nice lady from Noch assured me that they are going to be available starting this December, but so far none has made it in the "In stock" area in my LokShop account.
At the bottom the Noch portal is visible; it's facing the other way, since the tunnel masts will obviously be inside the tunnel.

miercuri, 1 decembrie 2010

Scenery Tests

Made a small test board about 2 weeks ago, to see how everything would come together - track, ballast and scenery. Just one side of the track has been constructed, while on the other the bare foam is visible; however it should be filled once I analyze the first half and realize what should be further tweaked.
But the real star was the imaging work done by a friend with pro- photographing gear and skills. The detail obtained is simply amazing.
In the next post I'll detail the materials used and post more photos.

duminică, 14 noiembrie 2010

Switch installed on SR

Not so much progress since the last entry, with only the Tillig EW2 switch mounted towards the end of SR segment. A small thing i've noticed is the change in the Tillig 86112 slow motion motors: if the first motor bought and installed about a year ago makes quite some noise, the newer ones, namely some bought a couple of months ago and the most recent ones, just a little over a month, are a lot quiter, with the last ones being the best, as they sound more like the prototype. I have no idea what causes this, and certainly is not the color of the casing, that first was black, and now, with the last 3 motors bought, seems to have turned to brown, but I'm going to contact Tillig, maybe there's an answer there.
The Lenz spare parts, as in the problematic wheels, didn't arrive after all, because the packet was returned back to Germany, the reason - a bad address. But I'm already used to it, since it's not the first time that this happened (Lokshop's full box of products being returned because of a can banned to see the inside of a plane is still fresh in my mind). So hopefully, yet again, this week the wheels might arrive, and who knows, maybe they'll fix the problem.
The last order to Lokshop - mainly rock molds and dedicated materials and the Brawa V100 loco - has half of its products in back order for about 3 weeks now, so I'm thinking about what to get next, so with a bit of luck I'll have new toys for Christmas. This only enforces the last rule i've discovered about model trains - if you think you might need something, order it with one month ahead the time you think you are going to actually use it.
A bit of zip texturing was tested, as described in the Sep/Oct 2010 issue of the Model Railroad Hobbyist magazine; which by the way is a very nich thing, and the price is - as the cover states - forever free. You can download it right from there site, in a variety of formats. After a bad start, trying to use water based pigments on plaster (with disastreous results), I ordered some proper
dry pigments and started experimenting. And until so far I cannot duplicate the 1:8 or 1:10 pigment to plaster formulas discussed by Joe Fugate, the guy that wrote the article. Maybe my pigments aren't that strong, or maybe there's something about the plaster I'm using. The ratio succesfully tested so far is 1:3, but I'm not so happy with the color, which looks washed, but adding more pigment and keeping the plaster quantity constant makes things worse, since the whole stuff won't "glue" anymore to the foam test patches.
The last photo shows the installed switch and most of the wires connected. Up next is testing that the motor can be unscrewed from this position (I didn't drill another hole through the foam+wood board since there are already quite a few) and connecting this switch to the existing SR track that's already glued.

duminică, 31 octombrie 2010

PT segment track status: complete

Finally the track on the PT (pre-tunnel) segment it's glued and electrically interconnected. It took quite some time because of the many little things that had to be done/fixed:
-various feeders had to be extended, since the original size was too short and they couldn't reach the space underneath the switch motors, were they're supposed to connect
- a couple of sections of track already cut to size had to be readjusted, because the original dimensioning wasn't done with one end firmly connected to the next piece of track, but rather simultaneously on both sides, hence small errors; but just an extra 1 mm in flex track length becomes a large problem since the track starts to buckle
- holes were drilled through the plywood for the PT switch pair
- the holders for the switches/switch motors on the PT segment had to be further tweaked, since the original versions were built just to get them up and running, but they couldn't properly sustain a train going over; so for the 3 switches on PT, a new plywood piece was glued next to the existing one holding the motor in place, and then different strip(s) of plywood were glued on the surface securing everything to the big foam board; for the first switch in the pair a foam holder was glued underneath the ballast piece since it was a better approach
- extra care was needed to avoid any kinks in the track pieces connecting to the switches, so pins and more pins and pins without the head were used
- for the second switch in the PT pair, the end of the remaining point blade also had to be extended since it wasn't staying in the tie plate, and with everything glued it gets pretty complicated to further modify the switch (the other point blade was extended here: http://piko-modellbahnen.blogspot.com/2010/08/test-driving-through-pt.html); the same old method was used, with 3 stranded wires soldered together forming the "extension", and this soldered to the tip of the point blade (originally i tried to solder on the outside of the blade, but the switch wouldn't go all the way through, so i used a small file to clean the solder and redo the same thing on the other side of the blade)
- a strange issue persisted with the (same) second switch in the PT pair - all the length of the switch is placed on a constant ramp, but the last portion (right over the switch motor) was level, which looked peculiar; all the various foam pieces - unglued yet -were measured and found to be the correct size, the switch itself wasn't bent and anyway it is rather flexible vertically, even in its foam ballast, so the only explanation could be that the big foam board was thinner in that exact spot; the fix was to use a strip of 1mm beneath all the supporting structures in this area as to "bump" the height
- the movement of the point blades on the first switch in the pair wasn't right in one direction; it seemed like the point blades would stall for a moment in one direction of movement; a little filling on a tie support causing this fixed it
- all 3 motors on the PT were unmounted, then remounted to test the access through the plywood holes; first the screw holding the actuating wire is loosened using a small enough ratchet that fits in the underneath hole, the actuating wire is removed from the mechanism, the 2 screws securing the motor to its plywood base are unscrewed and the motor then comes off; when remounting the screw for the actuating wire needs to be tightened a bit, otherwise the ratchet will not work, and the motor will have to be removed again to access this screw.

All the testing this weekend was done using the PIKO BR 01.5, since the Lenz BR 66 developed a small problem with one of its small rear wheels - namely a 'tick' every one revolution. I couldn't figure out exactly what causes it, so I mailed Lenz the exact problem, and they're sending a new type of wheels. Hopefully in about 2 days they'll arrive. As for the PIKO loco, I've spent quite some time with the desk lamp studying if the flanges touch the tie plates of the Tillig code 83 track, and couldn't come to a definite decision. However, after this weekend operating sessions, comparing the tie plates to their original state, several bumps on the plates seem to be a little shiny, a sign that sometimes the flanges do make contact. I'm looking into buying replacement wheels for the tender, since 2 of the motor wheels are located here and also because the difference in pulling power on the new Tillig track vs the old thick PIKO track profile is dramatic - the loco barely pulls itself on the new track. And it's definitely not because of any oily debris on the traction tires, since these were cleaned properly.


The photos: 1. final preparations before glueing the switches in place; 2. glueing the track under (proper) weights

marți, 19 octombrie 2010

LR track in place


The last piece of track needed for the LR was trimmed to size, all the right superelevated ballast foam pieces have been prepared, glue has been applied and right now it's all left to dry overnight.
An important thing i've observed tonight is how the Tillig joiners must be tight for glueing 2 adjacent pieces of curved track - the first pair used was kind of loose,and the kink was obvious. After changing them, everything got better, with the kink gone and half of the pins pinning the track down becoming useless.
Opinions about soldering the track are shared, but i choose not to solder because of 2 reasons: it doesn't look good from the examples i saw on the net and second, the track, just like the prototype, needs gaps at the end of each piece in order to contract/expand during periods of cold/warm weather. Soldering is however done on each piece of track, but to feeders. Actually this is how the old Piko track was done - with each sectional piece electrically connected to its neighbour by two thin fires placed under the ties. A bus will not be used for the current, since the original block scheme done for DC mode meant that for about 2 metres of track there was a separate pair of wires that fed it directly, this will be used, but now thwy will all carry the same DCC signal.

duminică, 10 octombrie 2010

LR continued

The order finally came, and with it the switch that was needed to carry on construction on the LR - a Tillig 85314. It got the standard 3-coat airbrushing, along with 2 other switches (Tillig 85323). And since i found setting up of the switch and attaching the motor rather complicated, considering i've done 4 previous switches, i made a small procedure that beside the initial step of painting the switches goes like this:
- build the plywood that will support the motor and drill holes for the screws (2); drill a hole for the rod that will move the points
- drill a hole through the ballast (the one corresponding to the switch model - without the specific model the switch doesn't stay right !) in 3 places - corresponding to the feeders on internal/external point blade and one that sets the polarity on the frog
- cut the right path in the ballast for the rod that will move the points
- with switch mounted in its corresponding ballast piece and the motor attached to the plywood piece right under the switch - with the switch in one of the two positions (not anywhere between) - the postion of the ballast on the plywood is marked
- if the tie holding the point blades tends to "slip" under its place right beneath the track, thus causing the motor to block when trying to move, then a little piece of plastic, cut from the material holding the tie plates together in tie strip, is placed transversal to the tie holding the point blades' direction; this problem can happen because of the turned tips of the point blades that are not long enough - however the tips should not be secured firmly to the tie holding them, because this will prevent a smooth transition of the blades when the motor is operating
- the shoes in the motor are ajdusted so the correct distance to the other position of the switch is right (actually just the 2 shoes controlling movement to the other position)
- the spots on the track where feeders will be soldered must be cleaned properly - using a bistoury to remove any oxide, using different patterns of movement - not just left-right, because this will not remove all the oxide; then the feeders are soldered
- electrical connectivity between the right blades must be checked, to ensure that no damage was done to the conductive elements placed on the back of the switch.

Last week holes in the big wooden board were made for the switch on the bottom of the LR segment, and for the switch on PT right next to the tunnel. Also the switch on the top of LR was finally glued to position, and so was the one on the bottom of LR. The LR ramp has been completely glued (the red books are keeping everything together in this operation on the first photo). All the electrical connections were also done for the mentioned switches. Part of the line that makes the LR was glued to position, along with superelevated ballast: the difference in height is 1 mm, which is prototipically correct (on real railroads the height of the outer rail above the inner rail , also named cant, can have values of 100mm).
In preparation of the Gras Master tests, some dry pigments were also ordered (second photo). Got these from a local retailer, and along with plaster, these are used in a technique called zip texturing, whose main objective is to produce realistic dirt.
Also a couple of old wheels were changed, since the damage was so hard that there was no other way (mainly because of handling them with the hands as a kid led to exfoliation of the material (chrom maybe?) coating the wheels).
But the real shocker was the Gras Master + Silflor (or miniNatur, as they are sold in Europe). The result is just superb, and the 130 euros payed just for the GrasMaster are certainly worth it.

duminică, 3 octombrie 2010

Up, up, and away !

After a long break, work resumed on the layout. More precisely, my attention turned to the LR segment. The entire ramp was already build, but there was a small problem. Many years ago, when the big foam board was initially placed over the wood one, there was still some remaining space. To fill this up, a small section of different foam was used. This is visible in the first picture, right next to the point where the SR goes to its right-most position. So the LR ramp has to cross both types of foam boards. Unfortunately when the first one was built, i didn't notice the slight difference in height between the two, because the small board is somehow "swelled", but leaving the joint between the 2 boards level. And so when the ramp was completed, there was quite a noticeable difference in the inclines along the ramp. The new adjusted track plan (done when I decided to use flex track) made use of a larger radius on the LR ramp. The original plan was for the individual ramp pieces themselves to be temporary removed, and then glued back in the right position for the new curve. But there was a problem: the plan also called for a higher track elevation in front of the station on the PT segment, so the incline of the new LR ramp would be totally different. So I decided to build a completely new ramp altogether - consisting of 6 individual pieces.To solve the height difference between the foam boards, the extreme most 2 pieces would lay directly on the big foam board (the material for this one is hard, and so serves as a good base), and the rest of 4, that would had come above the small foam board will be done just like one of the switches on the PT segment - namely using the 1.3 cm squares attached dirrectly to the wooden board, a "girder" to get to a higher elevation, and on top of that the ramp pieces themselves. Holes for the "girders" where made, the pieces of foam squares that were in the way were removed, and alchohol was used to get the glue out. A screwdriver also came in handy, as to gently shave away excess foam and the glue, since the latter has a tendency to harden as soon as the alchohol evaporates. After 3 of these "girders" are glued, along with the 1.3 corresponding pieces, a new problem appeared: the whole thing would move way too much, because the 1.3cm bits do not secure the structure sufficiently. The solution is to glue another piece of foam, so one side rests on the "girder" and the other one on the foam board.
Lessons learned from this episode: 1. the foam boards rated 5 cm are actually 4.8 cm (discovered this when the ramp was first mounted as a test), 2. 2 pieces of 3 cm stacked on top of each other are actually 5.85 cm - so I ended up cutting 2mm and 1.5mm foam strips to fix this - 3. assumption is a bad thing (1. and 2. happenned because of this), 4. a level is priceless - a small nifty one that was in the house and found its use for the first time on the layout (i wonder how i manage to build the rest so far without it!), since the ramp itself needs to be level (later the ballast pieces that will come on top will tilt the track on the inside of the curve).
In anticipation of more track laying, 12 tie strips were given the first coat of paint using the airbrush today. The next 2 coats will have to be done as soon as possible, because a new order is coming this week, containing amongst others, the switch that's right on the start of LR, a couple of wheelsets to convert a couple of cars and, not least - the Noch Gras Master.

miercuri, 25 august 2010

Fixing track on SR

Finally fixed some track ! And not with temporary pins, like everything done so far, but with glue. Trouble was, after the removal of the old ballast foam pieces from the SR segment, the ramp that was left behind wasn't very smooth, presenting all sorts of little dimples because of the glue that sticked to one side or the other (next time I'll use some of the magic ingredient i learned about recently - namely rubbing alcohol - before starting to dismantle old glued stuff). Roughly cleaning both the ballast pieces and the ramp didn't solve the problem entirely, because when testing to see how things would fit, the track was uneven - lower where the little dimples were and higher where little bits of old glue were left - instead of a smooth continuous climbing piece of track. So I thought about glueing the track with some sort of a distributed weight, like a train, so the resulting track would be right, while the uneven portions of ballast / ramp would be taken care of the glue. And since plain cars were too light, I pulled out enough locomotives to fix the current piece - 1 meter of Tillig track. www.lancemindheim/track_laying.htm provides very helpful hints about track laying. Their advice is to use a thin line of glue in the center of the line, before fixing the track to allow the glue to dry (honestly my thought was to paint area right beneath the track with glue - how much wasted glue would that have been). So after applying some glue on the ballast pieces, i fixed these with 1 pin per piece, then "drew" the white glue line on top of that. Next the track (that already had feeders installed on both ends) was layed, and this too temporarily fixed with pins, making sure there are no kinks or changes in the curve's radius. I cleaned the glue below the edge of the top end of the track, since I realized that without the next piece of track, i will most likely end up with a kink right at the junction. And since the Moment adhesive stated "express", i quickly added the locos on top and left it to dry overnight (the locos, from left to right: BR110, BR120, another BR110 - all 3 described in an earlier post and 2 BR 211 electric locos; none has the right wheels to run on the Tillig code 83 track). In the end I made sure the track is banked on all its length (since discoveries like bent ramp in the wrong direction are of course made right when the glue is being applied) - visible in the second photo as the red loco leans towards the inside of the curve. And speaking of things that won't fit, the plan for the SR segment, when placed over the constructed ramp, was a couple of centimeters to the left. And since the current plan is based on the old one, also drew in 3rd PlanIt, I can only suspect that the old initial printed plan wasn't truly 1:1, since this happened the first time I printed the actual plan, but luckly I measured the distance between the grid lines, only to find out the difference was more that 1 cm for every 20 cm (and then went ahead and reprinted everything on a better printer). Or somehow the original SR ramp wasn't correctly installed according to plan - anyway a better easement was possible using the extra few centimeters.
Right now about 3 weeks of vacation lie ahead, so the Paasche VL 1007 airbrush got a thourough cleaning, and the layout will get a rest. Last 2 photos show the Lenz BR 66 and the double decker car testing the now glued segment of track.


luni, 23 august 2010

Test driving through PT !

The PT segment is coming together bit by bit. Finally all the electrical connections were made, the missing piece of track starting from the second switch was installed, feeders were connected on every length of track, all the frogs were polarized and all the green/grey feedback wires were connected to the wires heading to the new casette. On the left the Lenz BR 66 coupled with the TRIX cleaning car and a PIKO dining car (WR ge) are test driving the track - not a correct era assortment, but this car and only a couple (including the double one testing the temporarily fixed track on SR segment in the second photo) i've discovered to have the new kind of wheels compatible with the Tillig code .83 track. I was quite impressed with the electrical connectivity of the lighting system (normally the light would flicker as the car moves - due to loss of electrical contact made through the wheels and lack of any capacitor to overcome this, but this test was ok and the light was almost always on). Glitches with the wheels of the BR 66 were encountered while going in reverse through the second switch, but since it's quite a sharp one, this won't be done in real operating sessions. On the third switch the third big wheel used to go over the blade (when going straight through the switch, not crossing to the other line through the second switch), but a little bit of filling and slight bent of the blade reduced this to a minimum.
Ran into a few problems with the switch motors though, because sometimes, in a particular blade position, the Viessmann transformer used to power up everything would start to buzz, and measuring the current would show something like 90 mAmps, without anything being operated excepted the LZV100 digital station, that draws a 20mA current by default. The fault was traced in the end to the mechanical shoes on the 86112, that were touching another metal strip different than theirs (there's a good review and very good photos at http://www.modelrailforum.com/forums/index.php?showtopic=979 - the shoes are cleary visible in the third photo). Extra care must be taken with these, because by default some of them are too close to the next strip, causing shorts like the one i experienced. Care must be taken after the initial setup, when the little screws holding each pair of shoes together are placed back, because the pair has a tendancy to roll a bit. If the shoes are still too close, bending slightly (SLIGHTLY!) the shoe in the right direction will take care of that.
Another small problem, this time with the Tillig switches themselves, is that some tips of the switch blades, that go through the switch plate, are sometimes too small, and the blade has a tendency to "jump" out of the switch plate. After trying repeatedely to secure this tip of the 3rd switch, it came off, and kinda imagined the 20+ EURs that went up in smoke. Luckily i managed to solder the end, and next to it a soldered piece of wire, and now it works perfect. Sometimes the switch plate goes down in one side, and so blocks the switch from going in the other side. This happened in the same 3rd switch, and was fixed with a plastic bit from a tie strip, from those that hold the ties together.
The built-in metal connector holding the frog rails for the second switch wasn't firmly attached to the rails exiting the frog, so a bit of soldering was done there too to fix this.
Also painted about 9 tie strips, since they are urgently needed for the SR segment and for the double rail in front of the (future, to be) station. The last photos show the balcony where i do my airbushing (and drying) and my desk (the syringes in the picture, used to mix the exact amount of paints might lead one to the word "junkie").
And since I was already airbrushing, and remembering that the side of the track is just too shiny, I decided to try and airbrush the sides of a test rail and then mount the tie strip. Unfortunately this test failed, since the chairs (the little pieces that secure the track to the tie) would get rid of the colour when the track and tie strips are reunited. So the airbrushing will have to be done on the spot. Better get some masking tape...

miercuri, 18 august 2010

Took some shots of the latest progress as of tonight. The aerial view shows the pre-tunnel segment, that starts in the north-west of the photo and ends just beyond the switch in the right corner, after which a tunnel is planned (hence the name - pre-tunnel). Also visible is the Phidget 1018 in the centre, connected for testing to the middle switch, and used to report the position of the switch to the PC via an USB cable. The orange device is a sort of bent screwdriver, and will serve its purpose when the switches are permanently glued, and the motor has to be extracted for maintenance; that's because the Tillig 86112 has a screw that secures the rod used to move the switch blades - and the screw has to be inserted horizontally, a bit of a problem because the motor itself is going to stand in the cut-off holes in the big foam board. So when the screw will need to be loosen, the device will come in handy from underneath the foam and wooden board, making it all possible. The elevated track in the centre is just old PIKO track that is for now left standing there since it is not impeding construction.
Next 2 photos show a closer look at the wiring that's been done so far, namely: feeders connected to all 3 switches (since 2 pre-made links on the back of the switch make everything work but the frog, just 2 wires per switch are needed), one wire as feeder for each frog of every switch connected to the white wire on the Tillig 86112, feeders connected to each end of the outer curve (linking the 1st and 3rd switch) and the same for the inner curve (linking the 1st and 2nd switch), return wires (2 wires/switch) for the feedback indication linking the new electric casette with the vecinity of each switch.
What needs to be done: install the trimmed ramp going from the diverging track of the 2nd switch parallel to the 3rd switch, connect the green / gray wires of the 86112 to the installed feedback wires and install small devices to connect all the corresponding feeders together (i'm planning a trip tommorrow to a shop that sells these), solder feeders to the missing length of track (that will start on the trimmed ramp), and sometimes not too far i hope, a test run with the BR 66 on a finally-wired-PT-segment.
There are some lessons to be learned so far: it takes me a *lot* of time to do some simple wiring, on something that is basically one crossover and 2 lengths of track connecting to another switch; more insulating connectors are needed that initially anticipated (both rails corresponding to a frog must be isolated from the next segment), mounting isolating connectors will leave a (obviously!) gap that will interfere with the track that's been cut perfectly to size with the Xuron tool, and last but not least, it's much easier to solder the feeders to the underside of the rails after a couple of ties from the strip have been cut and temporarily removed (instead of trying to squeze the solder gun through 2 ties). But the main point remains my snail progress (ballasting is not even in sight yet !).


duminică, 15 august 2010

PT switches painted

At last all three switches have now been airbrushed. The procedure used is not that complicated in itself, but unfortunately it tends to take some time, because of the little small steps. I settled on this after documenting around the web, and testing on several rail ties strips. It all starts with cleaning the rail ties. For this I use a container large enough to hold the piece needing to be airbrushed, and filling this with water and a bit of liquid dishwashing detergent. Next an old toothbrush is used to clean the ties thouroughly. The whole point of doing this is to remove all the grease or any other debris that's still left and might cause the paint not to stick properly. Water is then used to clean them, and the strips are then set to dry (a kitchen absorbant towel works best for this). In the meantime the paint is made. I use one third Tamiya XF-10 (flat brown), one tenth Tamiya XF-1 (flat black) and the rest of a bit over half is thinner (Tamiya X-20A). It's best to buy the bigger bottle of thinner, since the small one (50ml) will quickly run out. Next the tie strips are placed firmly on a newspaper using scotch tape - 3 glued to the underneath of the strip, and 2 on each of the 3 to hold it to the newspaper. I hang the newspaper so that the tie strip is upside down - and i've found 2 reasons for it - first, since my Pasche airbrush is bottle-fed, it means i can't tilt it too much because paint wan't be absorbed, however the airbrush stays perfectly horizontal since it only moves up and down (and left/right to get a good coating of the tie plates), and second, if a switch is being airbrushed, keeping it horizontal will get too much paint on the outside of the upper rail, since the paint mist will settle down. The airbrush is held about 10 - 15 cm from the target, and the movement is rather ample, as you need to go over each end as to avoid getting too much paint on the edges and less in the middle. I'm still unsure about the drying time after each coating, but it seems like anything more that half an hour in this 35 degree celsius summer days is enough. Now if this is a switch that's being painted, special measures need to be taken. Since I didn't buy the kit, that let's you assemble everything (ties, rails, etc), the whole completed switch has to be airbrushed. And for the paint to be removed easily after each coating, a q-tip dipped in little mineral oil is best. After the coat has dried, another q-tip with oil is used to clean to paint stuck to the rail heads, and also to prepare the rail for the next coating. After the last coat a q-tip with a bit of thinner is used to remove any trace of paint from the top and side of the rail heads.
Right now i've settled on 3 coats of the same colour, since it seems to produce the best results. From my experiments, there is a visible difference between the second and the third coating, so if you're planning to do your own airbrushing, i strongly suggest agains any shortcuts, since the effort to remove the glossy plastic look is well worth it in the end.
I remembered this weekend that i ordered some weathering stuff, namely Noch patina pulver (61165) and the Woodland Scenics Earth Color Kit (C1215). Since the WS kit is paint-based, and that kinda scared me off, i turned to the Noch weathering powders to see what could be done about the rail ties. The trouble with the ties, after they're airbrushed, is that they're pretty much the same colour, and so not that realistic. So i took a couple of tie strips that have been painted, and tested all the 8 pigments. The idea was to use a drybrushing technique - getting just a little bit of paint on the brush (preferablly old and stiff) and lightly touch on the details - in this case the wood details on the ties. The best results came with the ash and cement pigments - maybe because they're finer than the rest, and tend to leave just enough colour behind to get a nice effect ("less is more" seems to be a rule in weathering).

duminică, 8 august 2010

Pre-Tunnel Segment - one step closer

The end of the week sees all the three switches wired, and PC-controllable.
But let's start where we left off - the second switch on the PT segment. A couple of tests were done to ensure everything works ok at this point, and the BR 66 worked flawlessly (first photo). Next the place for the hole in the foam board for the third switch was marked, I heated up the soldering gun, started cutting along the markings....and soon stopped. The thing is this last switch does not need to be "sunk"; both its starting and ending point are well above the ground foam level. So instead of carving the whole switch ballast contour, adding the 13 mm pieces where the old squares were, and glueing on top the 30 mm thick board, so the required height could be met, a portion of the ramp where the height was lower was used (4 mm lower actually - since that is the distance from the bottom of the tie to the bottom of the switch ballast piece).
Next on the list was a minimal wiring - connecting all the return conductors (red on the 86112 Tillig switch motor), and the other 2 wires (pink/yellow) to a Phidget 1017 board. The return conductors were all connected to the center casette (a future post will detail the wiring), using a Viessmann connector (if you're looking for something like this - the code for the yellow one is 6842), while the Phidget and its corresponding wires were placed in a new casette that was dug, right below the front track in the second photo. Also new holes were carved in the foam board for easier access to the wires.
The outer track was cut to size using the Xuron tool, and Tillig connectors were used when needed to hold the rails together.

What needs to be done next: solder feeders to the end of each track segment (the Viessmann 85501 connectors are good, but they will fail eventually regarding electrical conductivity), polarization of the frogs (the frog of the Tillig switches is not "live" - but the 86112 motor comes with wires especially for this), insulation between the diverging track of the switch pair (Tillig 85502 connectors), cut holes in the base wooden board for later access to the switch motors (and the really important thing - find a way to hide it), connect the wires for the feedback indication (which way the switch is set), airbrush the ties on all 3 switches, and any remaining track strips (6 strips are already done since a couple of months ago), and mount the last remaining piece of the ramp up to the station.


marți, 3 august 2010

Status Report 2

Last week the switch next to the tunnel was temporarily installed. The first photo is taken during the mounting of the switch motor. The next one shows the mounted switch, with an TRIX 24050 cleaning car testing the track. On the old track, the mobile cleaning pads fitted on this car would snag at rail joints, causing it to derail or jump off the track. Yet another reason for the complete migration to the Tillig track. Part of the plywood used to hold the switch motor together with the ballast piece is visible on the second photo, right next to the wires feeding the switch. One of the tunnel portals will be placed right next to the end of this switch. Also visible is the Viessmann transformer used to test the switch, and next to it the Lenz LZV100 command station, used for testing the performance of the Lenz BR 66 through the switch. It worked almost flawlessly, except for a small bump in the center wheels on the right spur, and some loss of electrical contact possibly due to the polarization of the frog, for which I didn't find time just yet.
Today work was done for the first switch in the pair of switches that will be located next to the station. The hole was carved since last week, and now the small pieces of foam 13 mm thick, that will be mounted on the same location as the old foam squares, were glued to the corresponding ramp segment for this switch. On top of this another 30 mm foam block will be added, and finally, the switch ballast piece will rest on all of this. Also the plywood for this switch was glued to the ballast piece. The last photo shows work on this switch, and next to it, the ballast for the second switch of the pair is placed for markings.

luni, 26 iulie 2010

Status Report 1


From the last post, a couple of things happened: the order i was waiting for finally arrived (after being refused at the airport in Germany the first time because it contained a Noch fixing spray) and another order was received, containing amongst others the switches for the pre-tunnel segment and a couple of meters of Tillig Elite code 83 track. Both were from LokShop. Also I ordered the Xuron 2175B track cutters, since it seemed an invaluable tool for working with flex-track when reading what others were saying on the web. This came from Shesto in the UK, since LokShop did not have this in stock, and Amazon had this thing in stock only in the States, but they would not deliver it to my address.


I managed to build a crude form of foam cutter, since the old one(s) (there were 2 of them) were somehow misplaced. The nichrome wire proves a real challenge to find around here, as I was only able to find some 1 mm thick wire, after searching through a dozen shops. Anyway, the photo on the left shows the first one, used for the roadbed on the SR (small ramp) segment. Pictured below is the SR segment (the small radius curve in the centre, and the outer one, barely visible, is the LR (large ramp) segment. The S/L naming comes from the radius of the curve, since the ramp of both segments is almost the same. The thing is all the roadbed and all the track was already mounted a couple of months back, but the roadbed had a couple of disadvantages: it was rather high, about 1 cm, compared to the Tillig roadbed, which is 0.5 cm, and secondly, the old track used to sit on top of the roadbed, including the ties; since the new track would have to have its ties embedded in the roadbed, the material used to coat it (saw-dust coloured grey, with the texture too small to simulate actual gravel) had to go. So right now about half the total layout roadbed has been stripped clean (using overnight soaking and washing away the sawdust), and the one needed for the SR segment in the photo is already cut to the correct thickness. Because of an initial slight error in mounting the wire, the roadbed also has an embakment, just like real railroads, where the track in curves is not flat, causing the train to slightly bend inwards and negotiate the curve better. A second wire-cutter was also built, for all the ramps that will be needed besides the existing ones - right now there is a need for the PT (pre-tunnel) segment and the link between the PT and the LR segments.


The first switch and its motor were assembled back in June, using a small piece of plywood for holding everything together and trimmings on the foam ramp to fix it in place. It hasn't been glued yet, and I'll upload some pics in a future post.


Recently I started working on the PT segment. Actually the stuff in the last order was almost exclusively for this - 3 switches and some track and ties. I went for separated track / ties because it is cheaper and also I need to separate the ties for airbrushing. On the right photo the PT segment is the outer one, with pieces of foam ramp temporarily in place. The ramp dissapears just under the overpassing track, since the clearence is minimal. So the rest of the PT segment going to the right (the double track) will have to sit right on top of the big foam board, meaning the appearence of the roadbed will be an issue. Like this was not enough, I discovered that the Tillig switches wouldn't match the plans - it seemed the radius was larger than that on the plans. It seems this is fixed by mounting the switch in the corresponding ballast piece (which I was inspired enough to buy). But this means that I could no longer simply glue the track directly to the large foam board and pour the ballast above it, since the ballast piece goes a couple of milimeters beyond the ties' level. So the ballast piece has to be "submerged" a couple of mm. I first tried cutting precisely just the required area, so I could extract it and trim away those mm. Unfortunately there was no way to push it from underneath, since it was glued to the matrix of foam squares used to hold the big board in place. So the piece was hacked away using the soldering gun, new squares 1.3 mm thick were made, and a piece of 3cm thick foam board (upper right part of the right photo) was cut so it would form the underbase of the ballast piece for the first switch. Next is the mounting of the motor and see how it connects to the neighbouring track.

duminică, 30 mai 2010

Wiring

Since the day will come that all existing track is going to be replaced with Tillig Elite code 83, I started preparing for the operation. So the feeders from the track segments had to be un-soldered, as it can be seen in the photo. This was done for all the segments, so now there's nothing much that remains to be solved, except removing the pins that hold it in place. Just as the photo shows, they were another downside to this old track.

And since there was some spare time, I also started working towards installing an entry signal right next to the east tunnel portal. The signal will be a 4012 Viessmann - fitted with 3 lights - red, yellow, green. 4 wires have to be set-up for this one. Installing the wires is a bit complicated on this layout, because it wasn't build on just a plain wooden board. Back when it was designed, since there wasn't much space available in this room (it still isn't), the board was installed on 2 hinges, and it sits between 2 closets. When it's not in use, the layout is raised vertically, and a nice shiny wooden board appears. When it's being used, the board comes down.
Since wires couldn't just go through the board on the other side, a checkered maze of foam squares, about 1 cm high, was installed, and on top of this a foam board, about 3.5 cm thick. The plan was to route all the wiring through this maze. Unfortunately in practice it gets difficult, partly because the maze tunnels are getting crowded quickly by lots of wires, and adding new wires requires special equipment. So I started drilling access holes in the top foam board, for better access. In the second photo the wires are installed and labeled, ready for the new signal.

luni, 24 mai 2010

New Orders

Now that all the track had to be changed, I made a new order to LokShop, with a few track items for initial tests. Among them were: the replacement switch for the old PIKO ones, Tillig 85323, the corresponding motor drive 86112, the roadbed specifically designed for this switch 86513. Since the 2 possible radiuses of the PIKO sectional track I had (380 mm and 440 mm) were nowhere to be found, I opted to go for flex-track. This is a special type of track that can be bent in the required shape, so one could create the desired radiuses around a layout. This also means that the model track can resemble its real-life conterpart more closely: real railroads use easements to go from straight track to curved track, something that is not so easy done with sectional pieces of track. The standard piece of Tillig flex track is 890mm long, and 3 pieces were ordered. I also got one piece of roadbed for the flex track. Tillig manufactures 2 types of ballast: a dark one and a grey one. And since all the products so far were based on the dark type, I also got a medium piece of grey ballast, to see how this would look. I added a couple of connectors and electric feeders for the new track, and also ordered the Lenz USB interface, and a new Silver decoder, to be fitted on an existing loco.
In the meantime I revised the plan of the layout, and decided how long the new tunnel would be - almost half of its initial size. And for catenary I decided I would use something discovered back when I was looking at the Viessmann products - a tunnel catenary kit. Inside you get a couple of masts, and some special metallic band that serves as the contact wire. Only problem with the masts is that they are bit taller than my designed clearence - so they'll need to be somehow hid under the terrain. I also found a couple of accesories for the catenary system (a height template and an auxilliary tool for setting up masts in curves) and made a new order with LokShop.
Looking around model railroading forums, I found that most of the pros in the hobby would paint the ties of new railroad track, to remove the plastic shiny look, and some would go as far as detail every separate tie individually, for increased realism. I decided to "break" the layout into sections that could be worked upon individually. And for the section just next to the tunnel, I decided for some retaining wall. The problem with most of the building sets, as well as tunnel portals/walls is that weathering needs to be applied, because out of the box, they don't look very good. But for weathering, the forums mentioned on and on the use of the airbrush - this is a small device that sprays paint in thin coats, allowing for remarkable effects - and various powder chalks, to simulate the aging. So yet another order went to LokShop, for 2 powder kits (one from Noch and one from Woodland Scenics), a fixing solution from Noch, and a retaining wall, also by Noch. Since tests with the curved Tillig track and roadbed showed that after installing the track, there were still places underneath the rail where there was a shortage of ballast, I added a box of dark Tillig ballast to the order.
I then turned to the airbrush, and started researching what was needed for this new tool.Besides the actual airbrush, a good source of compressed air was required. Small cans were available on the market, but as forums were against it - because of quickly mounting costs, I opted for an air compressor. This have the advantage that they produce constant pressure, and usually come fitted with a regulator and a water-trap, that keeps water out of the exposed blast of air. The compressor was a no-name, at about 90 EUR, and the airbrush chosen was a double-action one, a Paasche MVL, at 130 EUR.The double action airbrush has the advantage of being able to control the amount of paint that gets sprayed, something that on single-action ones is not possible. The decision was to buy an airbrush that was a bit expensive, but hopefully superior in quality, than to go with a cheap one and just waste my time, taking into account I had no experience with this type of tool so far.
As 3 weeks went by from the initial LokShop order, and since the Lenz USB interface was the only item that didn't make it in their stock, holding the entire order, I emailed them for details. And since they had no idea of the cause of the delay, I emailed Lenz, that previously provided very helpful when I was inquiring about the LZV station and the BR66 loco. The reply was that a part used for manufacturing the USB interface is currently not in stock, but production is expected to be resumed in 2-3 weeks. And since it was already mid-May, I chose to have the order delivered without the interface, and also without the Woodland Scenics weathering powder, that also didn't make it in their stock. In all, it's just under 180 EUR - for the track pieces, the tunnel kit and the Noch products.
The DHL tracking looks promising, and hopefully tommorow I'll be able to pick up the products. A small note about buying directly from dealers in Germany - it usually costs less, including the transport costs than to get the products at a local dealer, that usually has only a few items in stock.
Update: The Noch fixing solution came in a can, so the whole shipment was refused on the airport in Germany, and got sent back to LokShop. They re-send it again, and hopefully this week it will be delivered.

Track Solutions

Around the beginning of april this year, I started looking for solutions to the track problems, detailed in the post "The Layout".The biggest one was replacing the PIKO switches, and I started looking around for a switch with the same dimensions. Web searches weren't successful, as different retailers used all kinds of different radiuses and the details of switches weren't clearly stated. I then turned to the program used for creating the original layout plan, called 3rd Planit, who had an extensive library of track items. So with the details of my PIKO switch on one side, I started comparing the different switches. After a while I found that Tillig produced a switch that had exactly the same dimensions I was looking for. Further research showed that this company was considered by many the producer of the most realistic model track around - the code .83 - named so after the height of the rail. So finally I would be able to change the old U profile with a normal "I" one, as on the real railroads. They also produced a slow-motion motor for turning the switches - which again adds realism. Tillig goes even further as to produce roadbed for their track, with already made holes for the ties of the track to fit in - so the final product looks as it's supposed to - unlike my PIKO track that was just layed on top of my flat ballast. The sawdust for my initial roadbed also doesn't scale so good as to simulate crushed stones normally used on the railroads - while the Tillig one looks right at home. But since pictures on different websites weren't enough, I made a visit to a local dealer to see the product first-hand. It was looking good, so I bought a small piece of curved track, with the corresponding roadbed, for further studies.
The new Lenz loco, just as the cleaning car, work just fine on this type of track, however most of the old PIKO rolling stock, because of the larger dimensions of the wheel flanges used back then, tends to lightly brush the ties as they go along. I could see 2 methods for fixing this - buy new wheel sets for the cars, and for the locos, where available, or use a grinder to reduce the diameter of the flanges. No solution was chosen at the time (actually I haven't made a decision to this day) but I studied further the track produced by Tillig, and found that they produced different models of curved switches, something I could only dream of with the PIKO straight switches I had. The decision was finally made that all track had to be changed.

Fixing Old Locos


After I got the spare parts for the PIKO BR 01.5, and saw that the parts actually fit, I now turned to a couple of old locos that had problems. This were 2 BR 110, both produced in the '80s - a red one and a blue one. The red one worked perfect for a while, unfortunately started exhibit strange symptoms: the motor would start making a buzzing sound (like friction) and the power was gone, as the engine was barely advancing. Seeing this, the guy who bought the whole collection of PIKO trains as I was a kid, namely my father, decide to buy another loco, of the same type, thinking that this particular loco had somehow developed a problem. So when he went back again to Germany (this were the '80s - e-commerce did not exist, and because Romania, the country I lived in, was still communist at the time, this meant going to Germany to get some good rolling stock - East Germany that is, since it shared the same ideas about communism as Romania - West Germany was out of the question), the model chosen was a blue one. Unfortunately after a while, the same symptoms were also experienced by this loco. Since any lack of lubriant was out of the question, since the locos were well maintained, something was clearly wrong with the engine for the whole series. Various tests were done with the motor in this blue loco (the reason the roof top is missing in the photo on the left, taken in april 2010), but no solution was found.

Because of the newly found funds for my hobby, I turned to PIKO, in pursuit of a new engine for this locos, or some other solution that could fix my problems. Learning from the past, where no reply came to my english inquiries, I used google translate to send german text stating my troubles. The reply was quick, and PIKO said that they weren't the ones who manufactured the loco, but instead a company named Gutzold produces this loco, PIKO being responsable only with the packaging under the PIKO trademark. I also remembered I had a different model of loco - BR 120 - that was also experimenting the buzzing sound, and looking through the locos produced by Gutzold, I found all 3 problematic locos on their site. I contacted Gutzold, with the same 'google translate' method - and the short reply was that the engines for this locos has reached the end-of-life.
So right now there is no solution in site for restoring this locos to working order.Gutzold still produces the BR 120, although it uses another model number (Lok 120), and the technology has been updated - DCC decoder inside and for some models even a sound module. You can find more details on their website http://www.guetzold.de/. Unfortunately they are no longer selling the BR 110.
The future is uncertain for the 3 existing locos. Some plastic gears attached to the motor wheels cracked on both BR 110 models, and replacements are no longer possible, although a company exists in my own town that does perfect replicas of different gear cogs. I am determined to get both a BR 110 and a BR 120 in the future. The BR 120 produced by Gutzold is 150 EUR (250 EUR with sound). I found that Roco also produces the model, at 165 EUR, and so does Tillig, at 115 EUR. For the BR 110, Brawa does the BR 114, at 250 EUR, including the sound decoder.
But right now I am determined to build the layout and spend some in this direction, rather than just buying rolling stock and having nowhere to use them, as it happened before.

DCC Testing

After the last shipment arrived, I quickly wanted to see how this DCC loco would perform. I didn't want to use the actual layout, since the old controllers were still connected to it, and since I needed some sort of loop for further tests, a new separate oval loop was constructed, using the same PIKO track.


I was also working on various formulas for automatic control of the trains, and this had to be tested in a consistent manner, and the new oval was just right for this. I had a pleasant surprise when I opened the package from Lenz, because besides the command station, I also found a Lenz DCC Silver decoder, which you were supposed to get only if the order came from North America; but anyway, a free decoder ! And since the spare parts for the PIKO BR 01.5 had to be installed, I figured this loco would make a perfect candidate for this first decoder. The decoder comes with a little book, that explains very well how you must connect the various wires. Basically all you need to do is remove the filtering capacitors and inductors commonly found on the DC locos, connect the wires that take current from the wheels straight to the decoder, and then connect the dedicated wires from the decoder to the engine. And this is exactly what was done in the photo on the right. The BR 01.5 has its motor in the tender, so this is were the decoder was placed. The front of the loco also draws current from its own wheels, but this feed directly the light bulb used for the front headlights, and since no functions were available on this loco, the corresponding wires were later cut from the decoder.


The Lenz BR 66 was impressing. On the original packing there's a little bag containing lots of small details (small pipes, various ornaments etc) that can be mounted on the loco. This were not mounted (actually there are in the same bag to this day), but the piston rods and small stairs from the front drive had to be removed, as specified by the Lenz instructions, so the loco could negotiate the 380mm radius used on the oval constructed.The loco is fitted with spring buffers, just like the prototype. I was further impressed by the speed the loco had on its lowest speed step, so as the engine barely moves. All but the front wheel are powered by the motor, so there should be no problems in the future for the grades on the actual layout. Going full speed ahead presents no problems, and the loco is able to take the abrupt, 380mm radius with no problems, however going backwards, even at a small speed, causes derailments as soon as the curve is reached, probably because of the small set of wheels on the back. This is not critical at all, because most of the time the loco will be set to forward motion anyway. The back-EMF function in the decoder assured a steady speed, regardless of straight or curved track. This is unlike the old DC locos, were this was impossible - you could get the loco to go very slow on a straight piece of track, but as it entered a curve, it stalled, because the friction involved grew, and there was no automatic mechanism to correct this. I found the back-emf to be also working in the PIKO BR 01.5, although because of the relative old motor, the performances of the Lenz engine could not be matched. Coupled with a bell sound, a short and a long whistle available in the Lenz BR 66, at 180 EUR, this proved to be a very good investement (later I would discover the "Made in China" logo on the back of the loco - partially explaining the reduced price - but the quality is nonetheless impressive).
Back on the oval layout, I also fixed 3 pairs of Mr Matix MRD1 optical detectors. The photo on the left shows the LZV100 in the upper left corner, the Viessmann 5200 AC transformer, two MRD1 boards, a pair of the optical detectors (right behind the PIKO BR 01.5 tender), and in the bottom a part of the Phidget 1018 interface, used to convey the signals from the MRD1 boards to the computer.
After encountering the same lack of electrical connection described in an older post, the decision was made to solder all the track pieces together, using thin wires, just as was done on the actual layout. The problems with the interference of the sparks and the optical detectors dissapeared, as no false readings were ever encountered.
Lenz also manufactures a computer interface, that connects to the USB port, so the problem of computer-controlling the layout seems solved.
Bottom line: DCC was the way to go, and cost of the decoders for the remaining locos was small compared to the value that the system brings.

More Investments

On the end of december 2009, as the "gap" problem was becoming impossible to solve, I looked around the layout, thinking what else could be done. Since the tests with the Phidget 1017, the board controlling the PIKO switches and Viessamnn signals were successful, I ordered 3 more signals (1 x 4016 daylight exit signal with distant signal and 2 x 4012 home signals) and their corresponding electronic modules. The modules produce the soft-changing of the lights, just like their prototype on the real railroads. Strange enough, the modules are more expensive that the signal itself - the 4012 is 11 EUR, but the electronic module is 23 EUR. I also got some electrical accesories for connecting the different wires that were getting numerous. I also thought of cleaning the track, and since getting through the (then still in place) tunnel wasn't so easy, I decided to go for a TRIX cleaning car - 24050 - very nicely done and with interchangeable cleaning pads, that were easy to wash. I received the order in the first days of January 2010.
I also looked on the figures required for getting in DCC. I decided to go for Lenz, a german manufacturer. A few things are required to begin operating in DCC - a control station, an AC transformer, and compatible locomotives. The Lenz control station (LZV 100) and its remote control were 240 EUR. I didn't need a new transfomer at this stage, since I had the Viessmann one already, and for testing it should have been ok. Trouble was with the locos, since none of them were equipped for DCC. Converting old DC locomotives to DCC operation is done with a special decoder, that is installed inside the locomotive. One Lenz decoder was about 25 EUR, not a steep price, but i wanted to see DCC in action at its full potential, and this would just have been impossible with an old loco fitted with a decoder. So I looked around for a loco that was DCC compatible, and was cheap enough. TRIX made some locos at 70 EUR, and they had inside dedicated space, and a connector for the decoder. So the loco would cost just under 100 EUR, which was fair enough. But further browsing on the Lenz website revealed that they also produced 2 HO locos - a small diesel one, and a steam loco - BR 66, that would be perfect on the layout, since it wasn't too small, nor too long. The BR 66 came in at 180 EUR, and I decided to go for it. At the time I was also trying to fix a broken front headlight piece of the PIKO BR 01.5 steam loco - precisely a light guidance plastic part, that was previously broken and then glued, the result being that 2 headlights were ok, but the third one was dimmed. Also a small spring for the loco-tender coupler was damaged, and some wheels on the tender were quite rusted. Since PIKO had on its website dedicated pictures and codes for the replacement parts, I emailed them for further assistance. Unfortunately I got no reply, as I would later found out the support only works in german, and google translate will prove a success in communicating with PIKO. So I turned to LokShop, where I got the other orders so far, and they were happy to help. So in mid-february I made the order for the Lenz LZV100, the Lenz BR 66 loco, and the spare parts - a total cost of 450 EUR, with the spare parts less than 10 EUR.

Problems and fixes

After switching the hand and sheets of paper with actual rolling stock, troubles started with the optical sensors. The Phidget 1018 and its IR detectors just didn't perform as expected.The problem with the infrared detectors was that the board they were installed on was quite big, and it was difficult to hide this behind a tree or some bush. An apparently good thing was that the IR emitter and the detector were placed on different sides of the same board, so this meant I didn't have to have 2 detectors, in an across-the-track positioning. But after a few days the problems grew: the black plastic of some locos and cars were giving a hard time to the IR detectors, because - as I would later discover - black plastic materials absorb infrared radiation, and so the dark-colored rolling stock was invisible to the detectors. If this were not enough, it wasn't so easy to cover the board behind some form of a wall, with a gap small enough for the IR to flow, because the infrared would just bounce off the inner part of the wall, and back to the IR detector, giving a false reading. So the detection solution had to be rethinked.

I considered buying more powerfull Sharp detectors for a while, but then dropped the idea, since the price was rather high, and I couldn't rely on this reflective method 100%. Searching around the net, in december last year, I discovered Mr Matix, that produced optical detectors specifically designed for model railroads. Basically for 15$, you got a separate IR emitter and a detector, and one board to hook these up. The good part was that this board could be connected directly to the Phidget 1018 input interface, instead of the IR Phidget sensors. Also installing the emitter and detector across-the-track, meant that there were no more issues with rolling stock material; if something was there, it would be sensed reliably, without false readings.
The photo on the side, took in april this year, shows the detector. I took this because I wanted to remember where it was positioned, since the detector was fixed using the tunnel ceiling.
With the detection problem solved, I went on to test the Phidget motor controller. With the DC operating mode, you actually command a segment of track; a voltage applied on this will move all the locos in that particular segment. Therefore you need to segment the track on the layout. This was already done, since PIKO produced little sections of track, that were gapped on both rails. So I connected 2 outputs of an Phidget 1060 to 2 neighbouring track segments. On a single segment everything went ok, but when the loco crossed the gap, it will get a sort of power surge, until it reached the other segment completely. Another issued appeared: the board itself used a pulse-width modulated signal, basically it was applying the maximum voltage on the loco for a fixed duration, then turning if off. For example, to get a 30% speed, 12V (the maximum voltage for DC operating mode) were applied for 30% of the time, then for the rest of 70%, the voltage was 0. This was of course repeated many times per second, so the effect would be smooth. There are however 2 known problems with applying this kind of signal to DC motors - first, the widespread idea that the motors would overheat, which I did not ran into, and secondly, the locos make a sort of buzzing sound. The buzzing was noticeable - imagine small birds singing quietly from within the loco, as the voltage increases - not very pleasant, but I could just go with this one. Another problem with the controller was soon experienced: the possible voltage was in the range -12V +12 V. For the positive side all went ok, but when you went from a negative value, to a smaller negative value (eg. from -10 to -9), the voltage would momentarily drop to 0, then get back to the correct value. Although it happened quite fast, it was noticeable, as the decellerating loco would appear to stall repeatedly. Yet another incovenient became apparent when the loco crossed the gap - sparks were produced, and this produced false readings in the optical detectors, in a random fashion. So the end of december saw different efforts to resolve the "gap" issues - various large inductors connected to the outputs of the Phidget controller, and a lot of documentation read for computing the correct value for this inductors. In the end the problem was that the controller outputs didn't have an internal common, so when the loco crossed the gap between 2 sections of track, each powered by a different output, in effect 2 different sources were connected together - something that in electronics is not recommended, because the resulting output isn't clearly determined.
Because the time invested in researching solutions for the various controller problems was getting out of hand - sometimes experimenting until late at night with various inductors and an oscilloscope - I decided that the Phidget 1060 had to be abandoned. Searches for direct current controllers weren't so successful, so I started researching DCC more closely. Now in DCC (digital command control) you no longer control sections of track. There's just one big continuos track, and the locomotives can be operated individually. You also get various goodies: output functions (light, whistles, bells), joining 2 or more locomotives in a consist, consistent lights on the locos, regardless of their speed (unlike DC, where the voltage applied to the track also imposed the lighting for the locos and inside of lit passenger cars) and a lot more. Only problem with DCC was the high price...

duminică, 23 mai 2010

Boom Times Ahead

Back when I was a kid, I used to play a railroad simulation game called Transport Tycoon. Besides lots of trains, tons of track laying and days from my life spent, this game also incorporated a sort of basic economy, and when things got better, you had this newspaper headline appearing - Boom Times Ahead.
Somewhere in October last year, the layout was basically in the same form as the preceding post. The track was all layed out, with some grey ballast made from sawdust, that I coloured myself. A better closeup can be seen in the left photo, took in april this year, when the tunnel ceiling was removed. At the time, I just wanted to get the layout up and running. All I needed was a way to computer-control the trains, and, hopefully, the rest will come along. In 2008, I stumbled upon a company called Phidgets, that produced some interesting electronics. They made very small boards, that could be connected to the USB port of the computer, and control small DC motors, command relays or read in values from various sensors. The board controlling the DC motors could be used for the computer-controlling part, the relay boards were perfect for throwing switches around the layout, also from the computer, while the sensors and corresponding boards could send values about track occupancy. I also discovered Viessmann, that produced some fine signals, with prototypical slow change of the lights, and semaphore signals that had slow moving arms, just like the real thing. So i made a small estimation of how much money would need to go in a few boards and a couple of signals for experimenting...and then decided to give up for a while, because if was too much at the time. Fortunately, in october 2009 I could get a little monthly budget dedicated exclusely to railroading, so things started looking up. I ordered 2 Phidgets 1060, that allowed me to control 2 DC motors each - this meant being able to control 4 locomotives at this time, one Phidget 1017, that could throw the PIKO switches on the layout, and one Phidget 1018 with 3 IR sensors, which I intended to use for track occupancy detection. Also one semaphore signal (4500) and a light signal (4013), one AC transformer (5200) and a couple other accesories from Viessmann found their way to my layout.
Once the order arrived, tests soon started. On the left the Phidget 1017 was being set-up for some tests with the light signal from Viessmann. The 1017 proved to be a success - it had 8 relay outputs - and a switch needed 1 relay to control it, the semaphore signal also 1 relay, while the light signal took 3 relays for displaying all its 4 color aspects. The 1018 and the IR detectors looked promising - at least the hand and some sheet of paper could be detected. The Phidget 1060 was also looking good. The 1.5 amp limit meant that virtually any locomotive could be operated. It also supported acceleration, so coding would be less complicated in the future. And the first tests with a small PIKO steam locomotive made me think that more 1060 boards would soon be needed.
Unfortunately further tests will reveal critical problems...