sâmbătă, 30 aprilie 2011

Spoked Wheels ?

Going through possible candidates for replacing wheels, I've found a PWG type luggage car. The lettering (click for a bigger picture) seems to indicate epoch 3, and PIKO did originally included "classic" wheels for it, but looking at a Brawa epoch III car, one cannot help wondering if indeed spoked wheels were used on this model as well.

Measuring Wheels

There's one glitch with the state-of-the-art, true-to-scale Tillig Elite track: older PIKO rolling stock doesn't run properly on it. More exactly, the wheel flanges touch the simulated bolts holding the track down. The stuff made back in the '80s is a definite no-no, while the equipement manufactered in the beginning of the 90s seems at first glance to be ok, but at a closer look some have wheels barely touching the ties, rendering them unfit for running on this new track. While the locos of that day clearly cannot match the performances of today's engines with their super-smooth running and excellent slow speed capability, the cars made back then are still looking
good. If one is to ignore that unreal bow-coupler used on every item, all it takes is a wheel exchange to make them fit for service again. Luckily, PIKO manufactures replacing wheels and, just like the locos of today, they too provide a superior experience. You can find their complete range here. So far, I've ordered several 56051, and they are perfect for those 2-bogies cars, where the tin used to hold the wheels together has room to expand. For the 4-wheels cars, like the one in the photo, they also work, although they don't seem to be have the same smooth rolling as the old ones. Using the caliper (upper right side of the photo) revealed only a minor difference between the lenghts of the old axles and the new ones : about 0.2mm extra for the new ones. So it could be either this, either a different form of the cone at the end of each axle that slighly affects performance. Nonetheless, it performs in a satisfactory manner, and as such i will continue ordering these, plus some 56050 to be used on an 1990s DBze double decker car.
The white wheels are the old ones, while the 3 axles closest to the laptop are the type used on the DBze. A final note: opening the car caused one of the plastic pins to brake. It has now been glued back on, but opening the car in this way has nothing to do with exchanging the wheels, it was pure curiosity.

Avoiding Kinks

I've decided working on the SR segment for a while, postponing the completion of the rock test board. The next part to do here was to continue laying the track up to the switch that's already in place. After taking the ties strips that were already painted since several months ago and
treating them with a combination of concrete dry brushing and raw umber / black washes, the Tillig rail profile was inserted and the track made ready for installation. Unfortunately when connecting this bit with the one already glued it quickly became apparent that i've run into a kink. What this means is that the curve is not smooth, causing it to "break" at the joint, because the end of the curved flex track has a tendency to straighen itself. To overcome this, 2 solutions are at hand: first, connect the pieces while straight, then solder them, so when the rail is bent, the curve will be natural, or the second one, stagger the joints, in other words making sure that the track is not sectioned in the same place so there is an offset between the cuts in the rail.
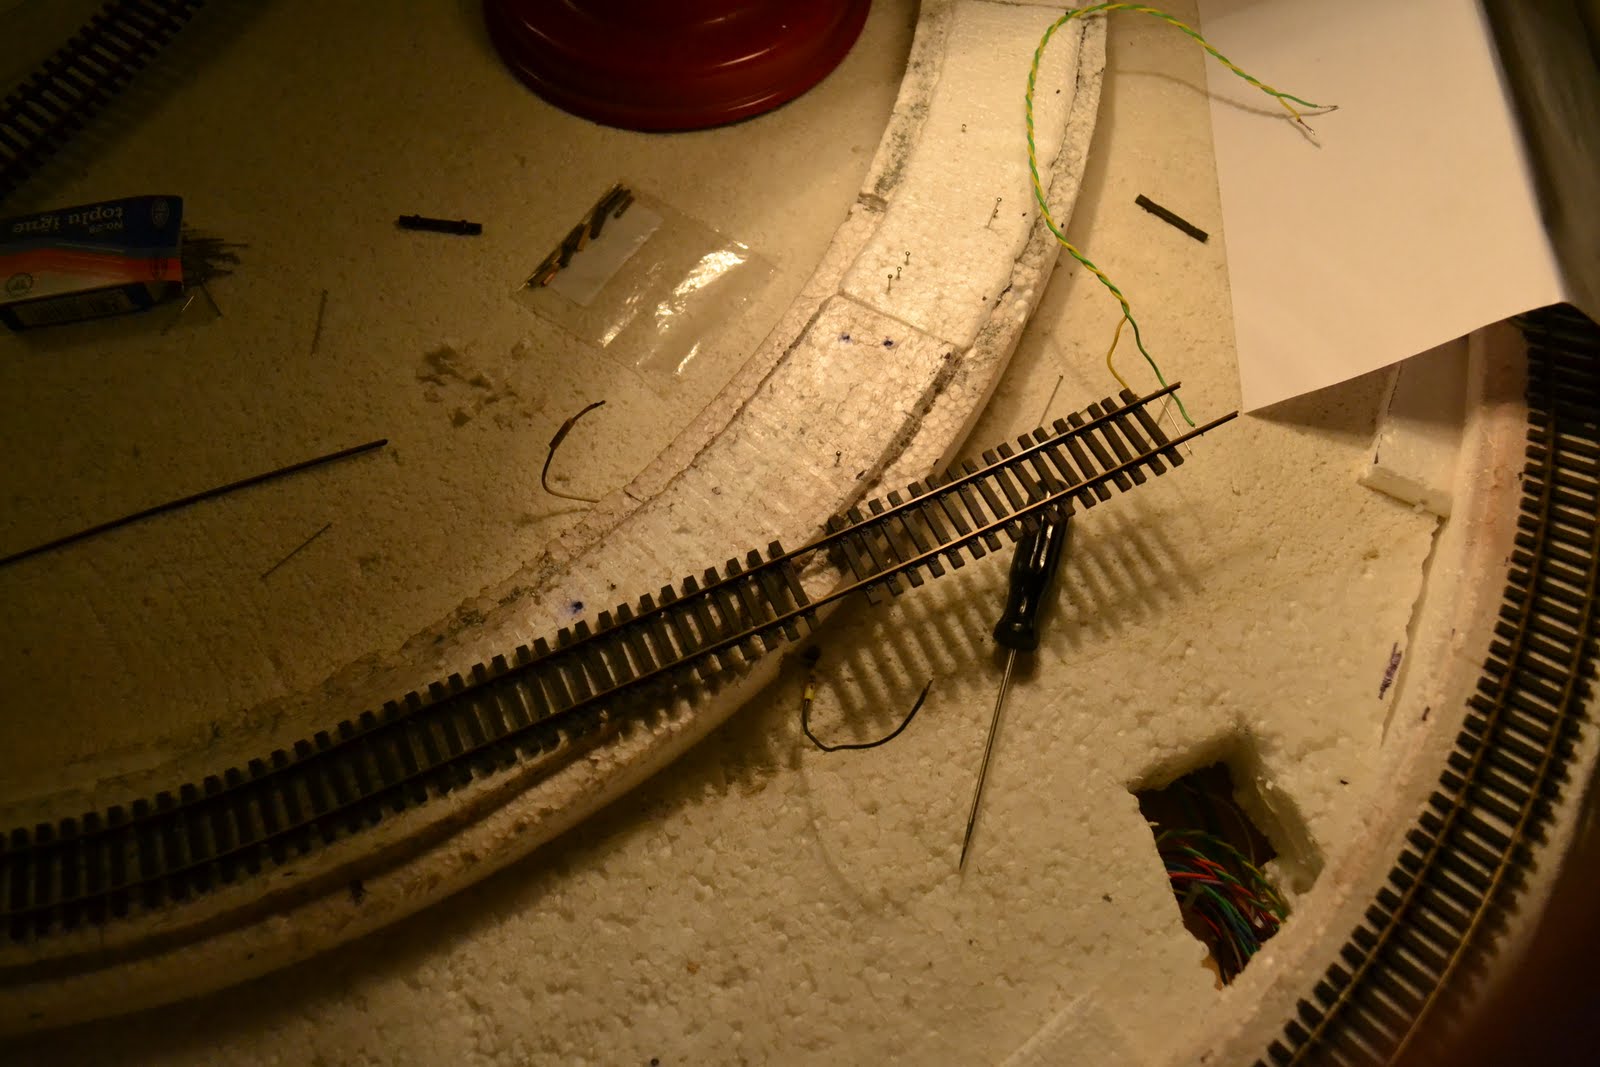
Since I'm not a big fan of soldering track segments together, opting instead for soldering feeders on each track segment (for electrical connectivity reasons), the only option was staggering the joints. Further analyzing the already laid in place track revealed the the curve's radius near the end was too sharp, causing derailments. So without rail templates (small metal gauge devices that you can slide through the track so one obtains the right radius) and with the 1:1 plans long since removed from the foam board, i had to resort to primitive measures: the center of the
curve for the start of SR was determined and a long crochet was inserted in the foam board, in that specific spot. Then using a ruler with a predefined small hole near its end, the correct radius could be obtained by using markings on the foam subroadbed. Next was determing the maximum distance for staggering the joints, since the 1m rail profile was supposed to last until the switch. This turned out to be 9 cm. A plan was then devised:
Step 1. Unglue the end of the glued track using alcohol and cut the outer rail by 8.6 cm; the cut had to be obtained by using 2 cuts back-to-back with the Xuron track tool, so the bit of rail could slide of the ties easily
Step 2. File the end of the rail, so the joiner can slide in smoothly
Step 3. Cut 2 ties in the place where the rail joiner will be
Step 4. Attach joiners at this end, then fix the whole track with pins and mark the places where the rail will be cut at the other end (near the switch)
Step 5. Cut the rails at the other end and then use a filer so the rail joiners will fit (a normal joiner and an isolated one for the rail connecting to the frog)
Step 6. Use a marker to draw signs on the foam roadbed to note the position of the curve (the foam roadbed was not attached yet at the moment when this plan was created, while the other pieces -the ones before the bridge - were already glued)
Step 7. Mark the places on the track where the feeders will be soldered (a permanent black marker works best for this)
In preparation of the soldering, this step was further expanded: for the new track - for the
switch side, the soldering points will be located after 1 free tie (the kind that are used at the en
d of a flex strip - they don't hold the rail together, as to permit the rail joiner to slide) and 7 normal ties; the points were to be marked on the side of the rail where the feeders will exit from the track; for the lower side, the points will be after 1 free tie + 4 normal ties; separate wires will have to be used because the rail will be curved afterward, causing one of the points to gain an offset to the other. For the old track, most of which was still glued, only a single soldering point will be needed and it will be located between the first and second ties next to the end of the outer rail; the first tie had to be eliminated (in its place, a free tie will be placed) and the second had to be moved by sliding on the inner track to ensure there was room to work.
The key to a good solder joint for a feeder is cleaning the metal spot on the back of the track. I use a bistoury with side-by-side and diagonal movements, so there is a small metal residue coming off, thus ensuring that all the oxide and various coatings on the metal are taken off. Take care as the spot needs to be only as large as necesarry, excessive cleaning of the metal leading to a large zone being covered with solder, and the ties will not fit on their original place. Next a small piece of flux is melted on this spot using the soldering iron. After this, the metal spot should have a thin solder covering, that looks shiny (usually the sign that it conducts electricity, as opposed to a cold solder joint, that will brake in time and that has a different look).
Then the feeder can be soldered, by heating it with the soldering iron against the back of the rail. The resulting joint should be mechanically solid and have the same "shiny" look.

Brawa telephone signal, continued

Having bought one small bottle of Tamiya Smoke and another one of Gun Metal, I decided to experiment with them. And since the brigde consisting of 3 Marklin bridge sections and the Brawa signal phone were on works now, and their finished look has to be that of metal, they were chosen as test subjects. The signal phone had the big "F" letter on the front protected with a bit of masking tape, cut to size, and then treated with 2 coats of Tamiya JN Grey (XF-12), then with one coat of Tamiya Smoke (X-19). The next step is figuring out how to use the gun metal and doing a bit of weathering.

vineri, 22 aprilie 2011

Weathering Piers

Alongside the double track on the pre-tunnel segment a pier will be installed to support the start of a bridge. The shiny new Marklin pier will not do without proper touch-ups, so it has got 2 coats of Tamiya XF-12 (J.N. Grey), and a couple of the bricks were highlighted using the same Woodland Scenics colors used to make the rocks so far. Next at least one more coat of grey needs to be airbrushed, after this maybe some washes, then the mortar lines, and finally some weathering powder.

luni, 18 aprilie 2011

Weathering Ties On The Layout

Work resumed on the PT segment, with the practices learned from the rock test board, namely: a wash with Woodland Scenics raw umber, a drybrush with WS concrete color, a black wash, again a drybrush with WS concrete and finally a raw umber wash and yet again a drybrush with WS concrete. It could be slightly overkill, and in the coming sessions of tie weathering, some steps might be omitted if the end results are ok. Unfortunately the before and after versions are taken at very different moments during the day, with the original at noon, and the final one in the evening the next day, under room lighting and a reading lamp. Click on the pictures for a close-up.


duminică, 17 aprilie 2011

Rolling Stock On The Rock Test Board

A bit of rolling stock was used to take more photos, with just the light coming through the window. To get more depth to the first shot, the first test board was placed in continuation of the current one, to avoid ending the scene too abruptly, just after the car. The camera used is a Nikon D3100 with an 18-55 lens, taking succesive shots with an increasing focus; the resulting images were then stacked together in Helicon Focus to create the output here. No other manipulation was done, simply because at this time I don't quite now how (if you look closely in the back you'll see some books on the shelf). Too bad the loco used here, the BR110, won't be able to run in the near future. Click on the photos for a bigger version.

sâmbătă, 16 aprilie 2011

Weathering Ties

Before the rock test board, there was quite a big issue with the ties, as it was described here. Fortunately, the guys at the trainboard.com forum and futher research around the web helped me find a solution. So, after the initial 3-coat airbrushing of the ties, a raw umber wash (Woodland Scenics raw umber, 1 to 40 parts water), a black wash (WS black, 1 to 40 parts water) and finally a drybrushing (WS concrete color). No drop of dishwashing liquid was used, specifically to not break the superficial tension, so as the wash dries (it is not applied uniformly across the tie, just a dab here, another half tie there and so on), it creates a concentrated borderline effect. If you look closely at the photo, you will see this. A final application of black weathering powder to simulate oil stains and various spills from the locomotives is all that took to create the ties featured in this previous post.
Actually this was the sole motivation in starting the second board, the fix for this problem, since without it no progress could be made on the layout, since the installation of the optical detectors will require that the track be at least partially prepared.


More Updates

The grass around the talus near the big rock suffered some modifications, because the first combination used (2mm early autumn+4.5mm late autumn) didn't look quite right. This probably also had to do with a careless use of the GrasMaster, since the green blades were flat on the ground, with the brown "dead" ones upright, but in insufficient number, and invisible because of the green ones. The small boulders in the first photo still need to be treated with black weathering powder and drybrushed. The second photo shows the overall situation at this point, with the wooden crate and signalling telephone temporarily placed. The first 2 photos are actually a series of multiple snapshots, taken using different focus, and stacked together in Helicon Focus, while the 3rd is a single snap of another area of grass that's been redone.

vineri, 15 aprilie 2011

A New Plant

It's been some time since I bought it, and now seemed the perfect opportunity to see how it works -the miniNatur 990-23 horsetail, seen here on the left corner on the second test board. On the right it's the already tried miniNatur 725-22.

duminică, 10 aprilie 2011

Test Board Update

Things went ahead with the recent test board, up to the point were the rock has been integrated with the surrounding foam pieces, track and ballast has been fixed, rock pieces have been placed near the rock, and grass planting has started. The talus doesn't look quite right at this moment, but I think a black wash will fix this. Grass still needs to be planted, both on the slopes near the rock and in the front of the line (where the big boulder inside the mould lies). Also more drybrushing will have to be done to the track, since using black weathering powder tends to lose that "depth" of the wooden rail tie. Some patches of earth will remain exposed, as to show the nice texture that zip texturing - the method used to generate the soil - does so good. The complete building procedure will of course be available as soon as the board is ready.

The last photo is done using 6 consecutive images, taken with different focus settings, and processed in Helicon Focus.

marți, 5 aprilie 2011

The Wooden Crate

When I was considering options for hiding the optical detectors, crates and various other objects were taken into account. As such I ordered a Preiser wooden crate kit, item no 18350, that contains 4 different wooden crates. I didn't went so far as to analyze how they would conceal the detectors, mostly because a better method was found (hiding them underneath the ballast or in small holes behind rocks or walls and leaving an opening that is virtually invisible) but they do provide a good opportunity to test weathering procedures. A 2 coat spraying was done using the same colour used for the railroad ties so far. And then it was time for drybrushing; both pictures are taken using a 50W halogen bulb as the main light source (and other secondary classic lights, hence the funny shades). The first one shows the progress after the first pass, unfortunately the second, containing the crate after the spraying had the light bulb just too close, hence the difference in colour. Next there will be a pass with various washes, as to break the colour monotony.


sâmbătă, 2 aprilie 2011

Rock Painted II

After a couple more touch-ups with some burnt umber and another black wash in certain areas, the rock face is now fully coloured. The photo shows this in natural day lighting, with the rock oriented toward and close to a window .